


Two answers up front, because they cover most of what people actually need.
Use synthetic brushes for acrylic, not natural hair. And keep a range of sizes on hand rather than trying to do a whole painting with one brush you like. Everything below is the reasoning behind those two, plus how to stop good brushes going bad.
Synthetic or natural hair?
For acrylic, synthetic. This is not a matter of preference or price, and it is worth explaining because a lot of guidance gets it backwards.
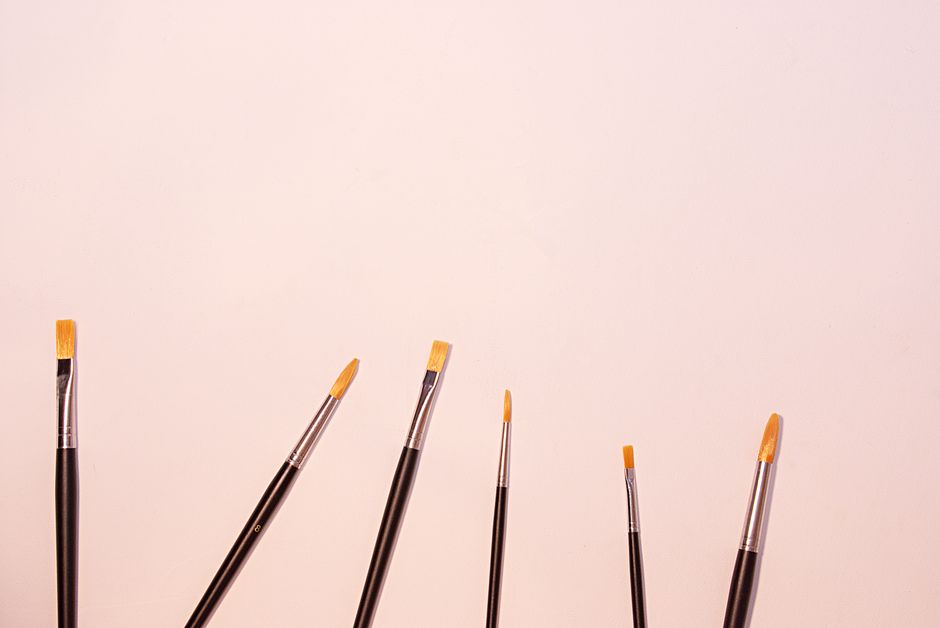
Acrylic paint is alkaline. That high pH strips natural hair of the oils that keep it flexible, so the hair turns brittle and starts snapping. Softer natural hairs have a second problem: once they are saturated with acrylic polymer they go gummy, stop holding their shape, and are very difficult to get properly clean. A good sable brush used for acrylic will be ruined long before it should be.
Synthetic filaments are chemically resistant, so none of that happens. The most common is taklon, a polyester filament dyed and baked to make it softer and more absorbent. Nylon and blends are also widely used. They hold a point when wet, they clean out properly, and they cost less.
Where natural hair belongs: oils. Stiff hog bristle is made for pushing thick oil paint around and holding a mark in it. You can use hog bristle with heavy body acrylic, but water makes the bristles splay and soften, so a stiff synthetic usually behaves better.
The four brush shapes worth knowing
Brushes come in a great many shapes, but four cover almost everything, and once you know what each one does you can read any brush by looking at it.
The brushes in a paint by numbers kit are a narrower set than that, and what each one does explains why three of them are enough.
Round
A round barrel of filament that tapers to a point. The most versatile shape there is: press harder for a thicker mark, lift for a fine one. Good for detail, outlines, and small areas, and a large round will hold enough paint for a wash. If you own one brush, own a round.
Flat
A squared-off head. Made for covering ground quickly and for laying down clean, straight-edged strokes. The trick most people miss is that a flat brush turned on its edge gives you a thin line as fine as a small round, so it does two jobs.
Filbert
A flat with a rounded tip, so it is a hybrid. It gives you the coverage of a flat but with soft edges instead of hard corners, which makes it the natural choice for blending and for anything organic. Petals, leaves, clouds and skin tones all suit a filbert.
Fan
Filament spread into a fan. A specialist: it is for texture and soft blending rather than for laying down color. Foliage, grass, fur, hair and feathered transitions. Used dry with very little paint on it, it does things no other brush will.
Three variations worth recognizing. A bright is a flat with shorter filament, which makes it stiffer and more controlled, good for thick paint and short deliberate strokes. An angled or shader has a slanted edge for getting cleanly into corners. A liner or rigger has unusually long filament that holds a lot of paint, so it draws a thin continuous line without you having to reload halfway along it.
Sizes: keep a range, not a favorite
The single most useful habit is matching the brush to the area you are painting, not to the painting as a whole. Big shapes take a big brush. Trying to fill a sky with a detail brush wastes an evening and leaves visible streaking where each stroke starts and stops.
A practical working set is smaller than most boxed sets suggest:
- A large flat for backgrounds and broad areas
- A medium filbert or round for most of the middle of the painting
- A small round for detail
- A liner if the work has very fine lines in it
Four brushes chosen that way will out-perform a twenty-four brush set where twenty of them never come out of the packet.
One thing that catches people out: brush sizes are not standardized. A size 4 round from one manufacturer can be noticeably larger or smaller than a size 4 from another. The numbers are useful within a brand and unreliable across brands, so judge by looking rather than by the label.
How to tell a good brush from a bad one
You can check most of it by hand in a shop:
- It should come back to a point. Wet it, flick it, and see whether the head returns to a clean shape. If it stays splayed, it will stay splayed.
- It should have snap. Bend the filament gently against your finger. It should spring back rather than flop.
- It should not shed. Tug the filament lightly. One or two loose hairs is normal on a new brush; a small handful is not.
- The ferrule should be tight. That is the metal band. If it moves against the handle at all, the handle will loosen once it gets wet.
Making them last
Acrylic is the least forgiving paint to leave on a brush, because it dries into a plastic film that is no longer soluble. Once it has cured in the base of the filament, the brush is finished. A few habits prevent almost all of this.
Never leave a brush standing on its head in water. This is the most common way good brushes die. The weight bends the filament permanently against the bottom of the jar, and prolonged soaking swells the handle and loosens the ferrule. Lay brushes flat instead, or suspend them so the head hangs clear.
Rinse before the paint sets, not after. If you are stopping mid-session, rinse rather than leaving a loaded brush on the table.
Wash with mild soap and lukewarm water. Not hot. Hot water softens the adhesive holding the filament in the ferrule and can damage synthetic filament.
Get the paint out of the base. Most people clean the tip and stop. Paint accumulating up inside the ferrule is what splays a brush permanently, so work the soap right down into the base and rinse until the water runs clear.
Reshape and dry flat. Draw the head back to its proper shape with your fingers and lay it down, or hang it head-downward. Drying upright lets water run into the ferrule.
We go into this in more detail in our guide to cleaning fine-tip brushes.
Can you use acrylic brushes for oil painting?
Yes, and this direction works far better than the reverse. Synthetic brushes handle oil paint perfectly well. You will need to clean them with the appropriate solvent rather than soap and water, and oil stays workable for hours, so a brush left out mid-session is not the emergency it is with acrylic.
The direction that does not work is the one people usually try: natural hair for acrylic, for the reasons at the top of this article.
What we would avoid is moving one brush back and forth between the two without cleaning it thoroughly in between. Traces of oil in a brush will interfere with how acrylic sits on the surface.
A note on the brushes in a paint by numbers kit
We do not sell brushes on their own, so this is a guide rather than a sales pitch. Every one of our paint by numbers kits includes brushes in a range of sizes, along with vacuum-sealed paints and a full-size reference print, and for most designs that is all you need.
The honest exception is the very finest sections on our more demanding designs. Some painters find it worth adding a small liner brush of their own for those, and there is nothing wrong with doing that. If you are choosing a first kit, our guide for beginners covers what to look for, and if you want to understand how paint behaves in layers, layering acrylic paint is the companion piece to this one.
If you want to see what the medium can do in other hands, the acrylic painters worth knowing worked most of it out in the decades after the paint arrived.
Good brushes, looked after, last for years. Cheap brushes looked after will outlast expensive brushes left in a jar of water overnight.


