Custom paint by numbers has recently surged in popularity among teenagers and adults.
If you've recently been on Facebook or Instagram, you've surely seenvideos of people painting huge, elaborate designs oncanvas , only with the aid of numbers.
What's even more surprising is that most of them aren't professionals - or beginner painters - but were still able to recreateVan Gogh's Starry Night orThe Great Wave off Kanagawa perfectly.
What was once an impossible feat for many now has become within our reach. Isn’t that quite remarkable?
Custom paint by numbers has opened new doors to a world of colors and art. What's even better is that anyone, no matter how young or old, can create their custompaint by numbers free.
Today I'll be guiding you throughstep-by-step instructions on how to get started , including helpful hints, tips, and tricks! You will learn all about custompaint by numbers generator.
Excited? I know I am! Let's get started. Painting by numbers is the perfect starting point for any budding artist. Some might say it's "cheating,” in a way, but that's simply not true! Think of it as a guide or a reference. Just like how we use training wheels, we use numbers to lead the way.
When I first learned about custompaintings by numbers over a year ago, I used Photoshop and Adobe Illustrator to meticulously split and number the work that I wanted to paint. And let me tell you - it took hours! Even longer than the painting itself.
While you can certainly use these two applications tocreate our free custom paint by numbers, there are luckily several free tools online that will do the job for you.
Two of the notable ones arePBNify andColor-Dragon .
When you load up either of these websites, the first thing they’ll ask you to do is to upload an image from your device or PC. It'll take a couple of seconds to render the picture entirely, and once it has, you'll be able to start editing and downloading your file.
Both Color-Dragon and PBNify do a great job of generating apaint by number template, completely for free. Once you've created and downloaded your paint by numbers template, you'll need the following materials before starting:
Optional materials: Before you start painting, make sure to work in a brightly lit, clean environment. It's preferable to work in a private space where your family members orpets won't disturb you while painting .
If you're planning to paint on a table, make sure to use a completely clear surface. Store anything unnecessary away from your paint to avoid any spillage or accidents. Only have items that you'll be needing close to you.
If you're painting on the floor, cover the ground with a plastic sheet, rosin, or Manilapaper to catch drips or paint splatters. It's better not to work on a plush, carpeted floor as unevenground makes painting harder.
If you'repainting on canvas without an easel , tape it on a flat surface with masking tape to keep it steady and stable. This is optional, of course, but I found this to be the most comfortable and most pleasant way of painting.
Alternatively, you can tape, tack, or binder clip your picture on a foam board or cardboard. This will make it easier to pick up and move to a different space if need be.
To make it easier, we've compiled a fewtips to follow while painting:
If you choose to follow the latter, you’llneed to go from left to right as you paint your way to the bottom. This is, of course, only for right-handed individuals. For those who are left-handed, go from right to left.
Painting by numbers isn’t a quick project, so it's easy to get into a calm trance. Double- or even triple-check that you're using the color you want to avoid any mistakes.
The firstlayer of paint acts like a base coat, and the layers after that help fill and smooth out streaks, while also giving it a solid color. Doing so will also help cover up thenumbers on the canvas so you won’t see them on the finished product.
Compare it topainting your nails; for a full-color coverage and a smooth, finished look, it's recommended you apply three coats of nail polish.
Apply as many layers as you want until you get a balanced consistency. But don’t overdo, as yourpainting may look uneven or lumpy .
One or two layers ofcolor are enough to soften the dark print of the numbers .
Remember the famous quote from Bob Ross, “We don’t make mistakes, just happy little accidents.” If you make a mistake, don’t beat yourself up about it! It’s nothing you can’t fix.
If you happen to put down the wrong color orpaint accidentally outside the lines , you'll have to wait for it to dry completely before attempting to fix the mistake. Once it's dried,paint over it with the correct color . You may need extra coats to cover it up, but it'll get the job done.
Here are some tips you can follow when blending:
This step is optional, but it's always good to apply a sealant on your finished product. Doing so will protect yourpainting from damage and give it a luxurious finish.
And that’s it! You've nowcreated a beautiful custom paint by number that you can proudly display in your home.
It's a beautiful way to create something that has meaning and value, and with enough time and patience, you can have a masterpiece.
Allow me to leave you with a quote byJerzy Kosinski : “The principles oftrue art is not to portray, but to evoke." There's no right or wrong when it comes to painting, as long as you put your heart into it and have fun!
If this all sounds like to much work, we have you covered.
CLICK HERE t o see the Ledgebay Paint By Number Store and grab your already made Kit Today!
If you've recently been on Facebook or Instagram, you've surely seenvideos of people painting huge, elaborate designs oncanvas , only with the aid of numbers.
What's even more surprising is that most of them aren't professionals - or beginner painters - but were still able to recreateVan Gogh's Starry Night orThe Great Wave off Kanagawa perfectly.
What was once an impossible feat for many now has become within our reach. Isn’t that quite remarkable?
Custom paint by numbers has opened new doors to a world of colors and art. What's even better is that anyone, no matter how young or old, can create their custompaint by numbers free.
Today I'll be guiding you throughstep-by-step instructions on how to get started , including helpful hints, tips, and tricks! You will learn all about custompaint by numbers generator.
Excited? I know I am! Let's get started.
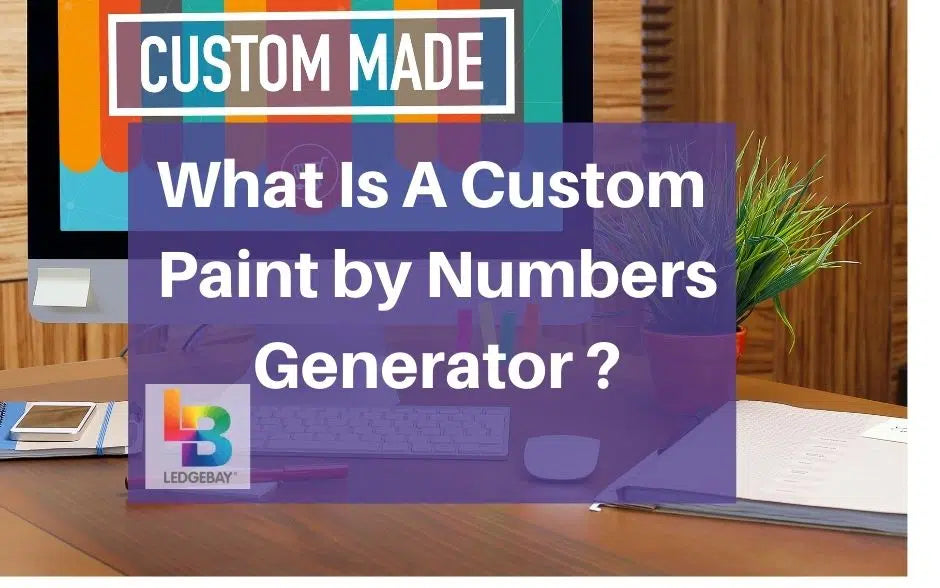
A Step-By-Step Guide To Creating and Painting Your Own Custom Paint By Numbers generator
With these five easy steps, you’llcreate your masterpiece in no time.Step 1: Preparing Your Painting
Painting by numbers is the perfect starting point for any budding artist. Some might say it's "cheating,” in a way, but that's simply not true! Think of it as a guide or a reference. Just like how we use training wheels, we use numbers to lead the way.When I first learned about custompaintings by numbers over a year ago, I used Photoshop and Adobe Illustrator to meticulously split and number the work that I wanted to paint. And let me tell you - it took hours! Even longer than the painting itself.
While you can certainly use these two applications tocreate our free custom paint by numbers, there are luckily several free tools online that will do the job for you.
Two of the notable ones arePBNify andColor-Dragon .
When you load up either of these websites, the first thing they’ll ask you to do is to upload an image from your device or PC. It'll take a couple of seconds to render the picture entirely, and once it has, you'll be able to start editing and downloading your file.
Both Color-Dragon and PBNify do a great job of generating apaint by number template, completely for free.
Tips To Follow When Choosing Your Picture
- Make sure to choose a picture you love, as you'll be spending a lot of time painting it.
- If you have more than one picture of a subject, upload your favorite ones and compare them side by side to see which one looks better when converted.
- Choose a picture with a background that isn't too cluttered.
- If you're looking to paint a family photo, choose a few subjects for more clarity.
- Make sure to pick a high-quality picture with good lighting.
- If it’s your first time, it’s better to choose a simple picture with a good color contrast before moving on to something more detailed.
Step 2: Gather Up Your Supplies
Once you've created and downloaded your paint by numbers template, you'll need the following materials before starting:- Good quality paints with a color palette that matches your picture
- Small and medium paintbrushes
- Mixing palette
- A cup of water to clean your brushes
- Paper Towels
Optional materials:
- Foam board or cardboard
- Masking tape
- Matte medium (if painting on canvas)
- Magnifying glass
- Clear acrylic sealer
Step 3: Choose a Suitable Work Space
Before you start painting, make sure to work in a brightly lit, clean environment. It's preferable to work in a private space where your family members orpets won't disturb you while painting .If you're planning to paint on a table, make sure to use a completely clear surface. Store anything unnecessary away from your paint to avoid any spillage or accidents. Only have items that you'll be needing close to you.
If you're painting on the floor, cover the ground with a plastic sheet, rosin, or Manilapaper to catch drips or paint splatters. It's better not to work on a plush, carpeted floor as unevenground makes painting harder.
If you'repainting on canvas without an easel , tape it on a flat surface with masking tape to keep it steady and stable. This is optional, of course, but I found this to be the most comfortable and most pleasant way of painting.
Alternatively, you can tape, tack, or binder clip your picture on a foam board or cardboard. This will make it easier to pick up and move to a different space if need be.
Step 4: Let’s Start Painting!
You've prepared your picture, your tools, and chose a perfect, quiet place to paint. You're halfway done! Believe it or not, preparation is the hardest step.To make it easier, we've compiled a fewtips to follow while painting:
Color By Number
When painting, make sure to startcoloring one number at a time. This is important because of three things:- Prevent the paint from drying
- Prevents you from regularly cleaning or changing paintbrushes while you work
- Allows the color on your canvas to dry until you're ready for the second number so the colors won't mix.
If you choose to follow the latter, you’llneed to go from left to right as you paint your way to the bottom. This is, of course, only for right-handed individuals. For those who are left-handed, go from right to left.
Clean Your Brushes Thoroughly Between Colors
To do so, you'll need to dip the brush into the water before wiping it clean with a paper towel. Repeat this step until there's hardly any color left before moving on to the next color.Make Sure You're Using the Right Color in the Right Number
One of the essentialsteps in a paint by numbers project is making sure you're using the right color.Painting by numbers isn’t a quick project, so it's easy to get into a calm trance. Double- or even triple-check that you're using the color you want to avoid any mistakes.
Be Generous With Your Paint, But Not Too Generous
Applying severallayers of paint gives your painting a polished look.The firstlayer of paint acts like a base coat, and the layers after that help fill and smooth out streaks, while also giving it a solid color. Doing so will also help cover up thenumbers on the canvas so you won’t see them on the finished product.
Compare it topainting your nails; for a full-color coverage and a smooth, finished look, it's recommended you apply three coats of nail polish.
Apply as many layers as you want until you get a balanced consistency. But don’t overdo, as yourpainting may look uneven or lumpy .
Use White Pencil to Cover Numbers
Extra layers ofpaint don't always cover numbers printed on your canvas 100%. This is especially true with lighter tints. You wouldn't want to see the ghosts of the numbers appearing in certain angles or lighting, and a whitecolored pencil helps cover it up.One or two layers ofcolor are enough to soften the dark print of the numbers .
Mistakes Happen, and It's OK
Nobody is perfect, not even professionals with years of experience under their belts.Remember the famous quote from Bob Ross, “We don’t make mistakes, just happy little accidents.” If you make a mistake, don’t beat yourself up about it! It’s nothing you can’t fix.
If you happen to put down the wrong color orpaint accidentally outside the lines , you'll have to wait for it to dry completely before attempting to fix the mistake. Once it's dried,paint over it with the correct color . You may need extra coats to cover it up, but it'll get the job done.
Finishing Touches
To make your painting even more beautiful, you'll want to create a gradual transition between the lines of your picture. Blending isn't always necessary, but it certainly adds to the subtlety of the work and can give your art a more professional finished look.Here are some tips you can follow when blending:
- Swipe your brush back and forth in a spiral motion on the edge of where two colors meet for a soft, subtle blend.
- Wipe off your brush every once in a while for a more seamless transition
- Stick to small areas so you can easily cover up any mistakes
- Only blend where necessary
Step 5: Seal the Painting
[amazon box="B001IKES5O"]This step is optional, but it's always good to apply a sealant on your finished product. Doing so will protect yourpainting from damage and give it a luxurious finish.
And that’s it! You've nowcreated a beautiful custom paint by number that you can proudly display in your home.
Final Thoughts - Custom Paint by Numbers Generator
Creating your custompaint by numbers generator for free allows you the freedom and creativity to turn anything into a keepsake for you, your friends, or your family.It's a beautiful way to create something that has meaning and value, and with enough time and patience, you can have a masterpiece.
Allow me to leave you with a quote byJerzy Kosinski : “The principles oftrue art is not to portray, but to evoke." There's no right or wrong when it comes to painting, as long as you put your heart into it and have fun!
If this all sounds like to much work, we have you covered.
CLICK HERE t o see the Ledgebay Paint By Number Store and grab your already made Kit Today!